

Hello again! The time for chocolate, family, church, and bunny ears is coming up fast! If you're as excited for Easter as I am, you'll love these five DIY decorations.
P.S. I am now on Instagram! Click here to go to my profile.
1. Bunny Crossing Sign


All you need is
- wood (I used parts from an old pallet)
- paints: pastel color for the main color and white for the words
- two screws
- drill
First, cut your wood pieces. You need two pieces: a wider piece for the 'Bunny Crossing' sign and a skinnier one for the stake. The size is up to you. Big sign, little sign, stubby sign, skinny sign. You choose!


Now slap on a few layers of paint.

Add the words. Paint a few hopping bunnies if you wish.

Place two screws on the back of the stake. Make sure the screws are short enough so that they don't poke out through the front of your sign! Also, if you sense the wood starting to crack because of the screws, you don't have to tighten them completely. The goal here is to attach the pieces together. Once the screws have done their job, don't tempt fate by tightening them.

Now go find the perfect spot in your yard.

2. Bunny Banner


Here's what you need:
- bunny template (see below)
- pastel-colored scrapbook paper
- scissors
- yarn, thin rope, or string
- hole-puncher
First, cut out a bunny template. You can choose whichever one you like. Here's the one I used:

I used three different colors of scrapbook paper (yellow, pink, and green) from Michael's to cut out sixteen bunnies.


Hole punch the base of their ears and string some yarn, thin rope, or string in through the first hole and out through the second hole.


Hang it in your home!


3. Curious Bunny

The supplies for this craft are:
- yarn
- pink felt
- felt that matches yarn
- small pot
- fake leaves/grass/flowers
- scissors
- hot glue gun
- white pom-pom
First, paint your pot. I painted my pot an Easter pink.

Next, make the bunny's behind. Wrap your yarn around two fingers. I recommend winding more than you think you need so that the pom-pom is extra fluffy, rather than scraggly.

After you've finished winding, cut the yarn. Cut another length of yarn about five inches long. Tie it between your two fingers.

Ease the yarn off your fingers and pull the tied yarn tight. I triple-knotted mine. Slide the scissors through all the loops and cut them.


Trim off all the long pieces and make it the appropriate size for your pot.

Now take your felt and cut two little feet and six little circles for the paw pads. Glue.

Assemble your bunny's behind, adding a little white pom-pom for a tail. Place it in your pot and surround with fake leaves/grass/flowers... whatever you come up with! I used some leftover trimmings from my last post: DIY Flower Hair Accessories.


4. Felt Chick

You will need:
- felt for body, wings, and beak
- scissors
- sewing needle
- thread (that matches body color)
- stuffing
First things first, cut out two chick-shaped felt pieces for making the body.

Next, sew them together using a needle and thread. It doesn't have to be fancy. Don't sew all the way around though. Leave the belly open.

Now, cut out an oval-like shape for the belly.

Sew it on, leaving a little opening for the stuffing.

Add some stuffing.

And sew it shut.

All that's left are some wings and a beak.

You're finished! Now find it a home (and perhaps an owl-friend).

5. Pom-Pom Bunnies

The supplies that you will need are:
- yarn
- scissors
- hot glue gun (and glue sticks)
- two black beads for eyes and a pink one for the nose
- ribbon
- pipe cleaners
- felt
First, start making the pom-pom by winding the yarn around two fingers.

Once your fingers are all wrapped up like a mummy, cut another, shorter, piece of yarn and tie it in between your two fingers.


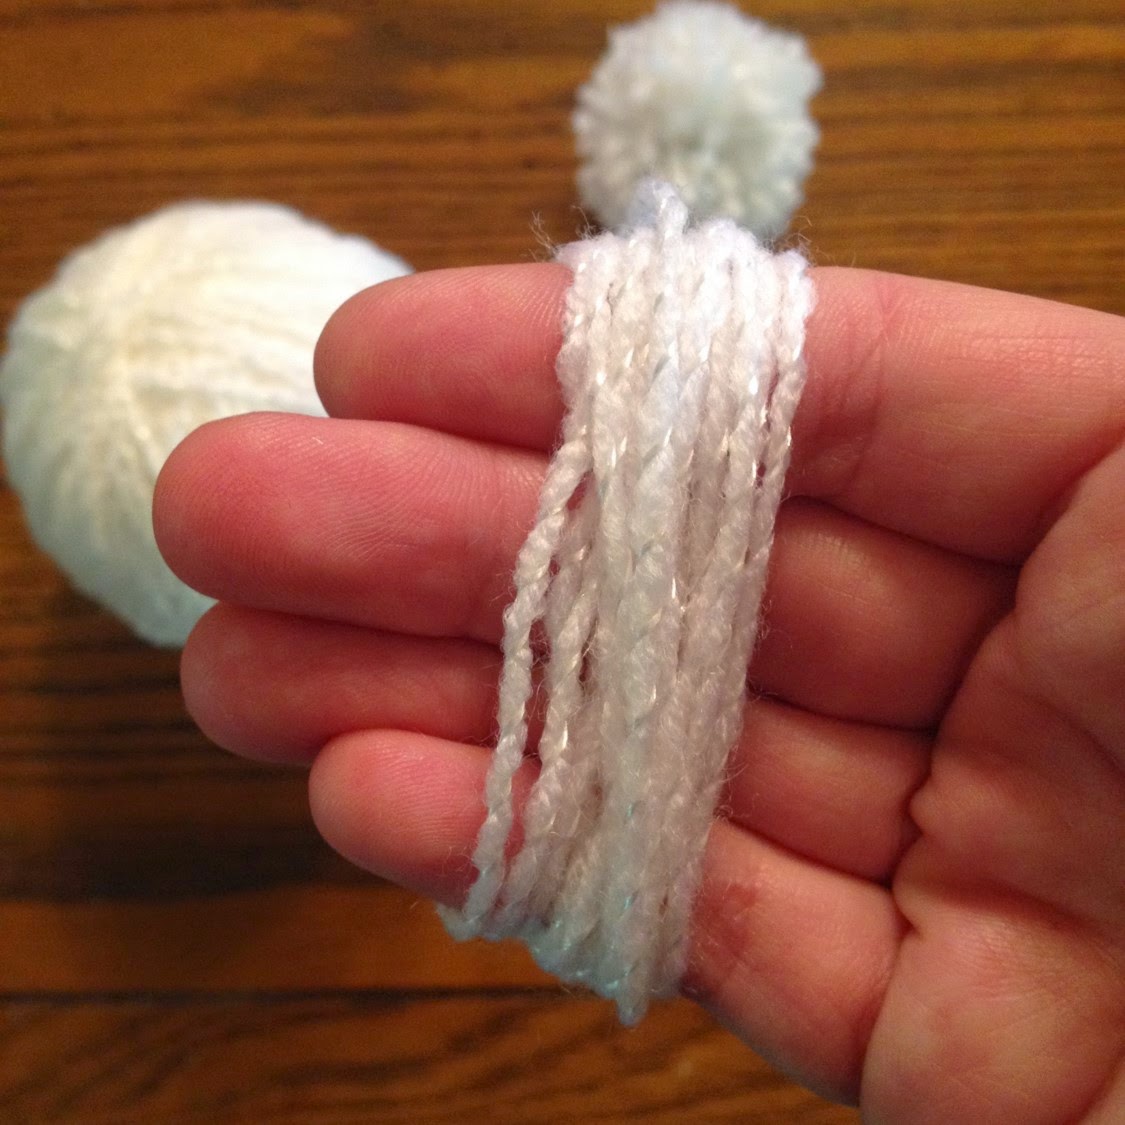

Now you should have one bigger pom-pom and one smaller one.


Cut out some felt ears.


Give it some pipe cleaner limbs. Tie a ribbon around its waist if you want.

Yay! It's so cute!


Hope you loved all of these adorable Easter crafts! I sure had a lot of fun making them. See you next on Easter Sunday!
No comments:
Post a Comment