Showing posts with label crafts. Show all posts
My Second Quilt
7:00 PM
I know what you're thinking... a second quilt?? Well, after I finished my first quilt, I had such a strong desire to make another one, so I decided to just go for it. I did no planning ahead of time and didn't even think about the colors. I just improvised as I went along.
DIY Blanket Ladder
10:28 AM
This project was unlike anything I had ever done before! Before this, I had never gone to Home Depot by myself, never bought lumber, never used a drill, never used a power sander, never stained wood... the list goes on and on! I learned so much doing this project and had such a great time with my dad working on it. We spent an entire Sunday afternoon working on it together in the backyard. It was definitely one of my favorite days of the summer.
I have always admired blanket ladders. They are such a fun way to display blankets and quilts (especially quilts!!). But they are surprisingly expensive!! I've seen them cost anywhere from $50 to $200! But this DIY version cost me about $15 and was so fun to make. Plus you get to customize it by choosing your own dimensions and your own stain.
DIY Fabric Bins
11:15 AM
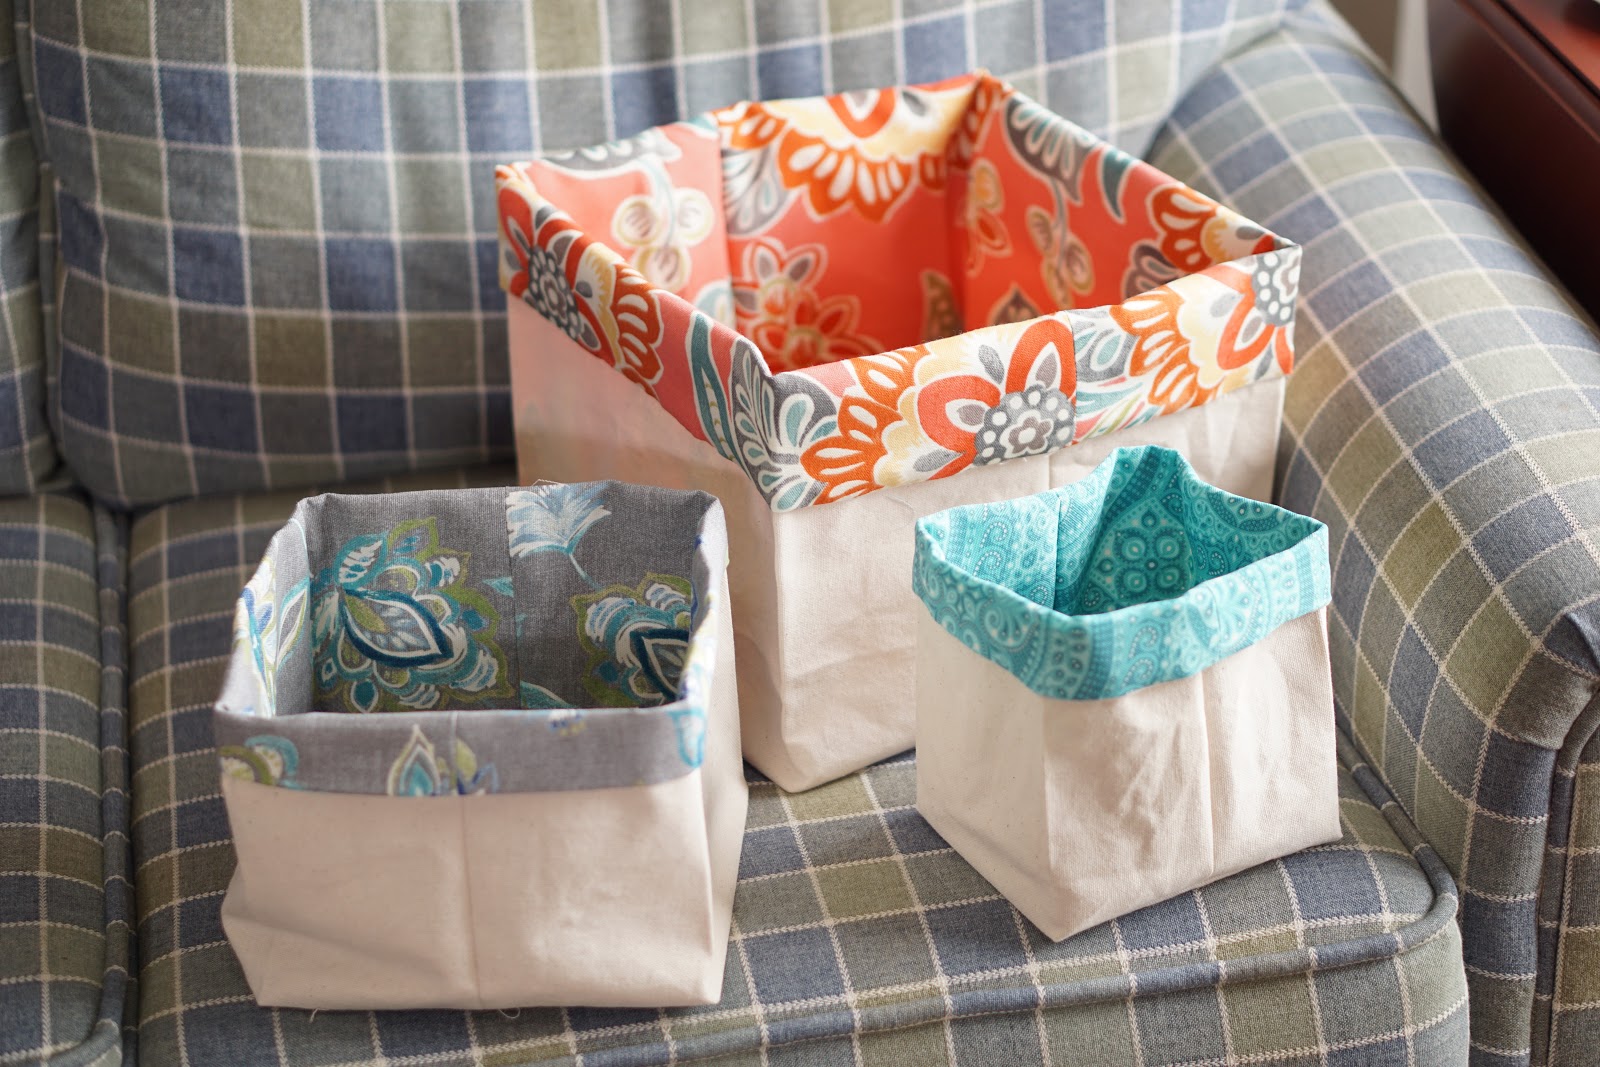
And, of course, this also means that I've been sewing up a storm! I wanted to share my latest little project that I've been working on for the apartment. I'm not entirely sure what to call them. Fabric baskets? Fabric storage containers? The tutorial I used called them fabric bins, so let's go with that.
My First Quilt
8:00 AM
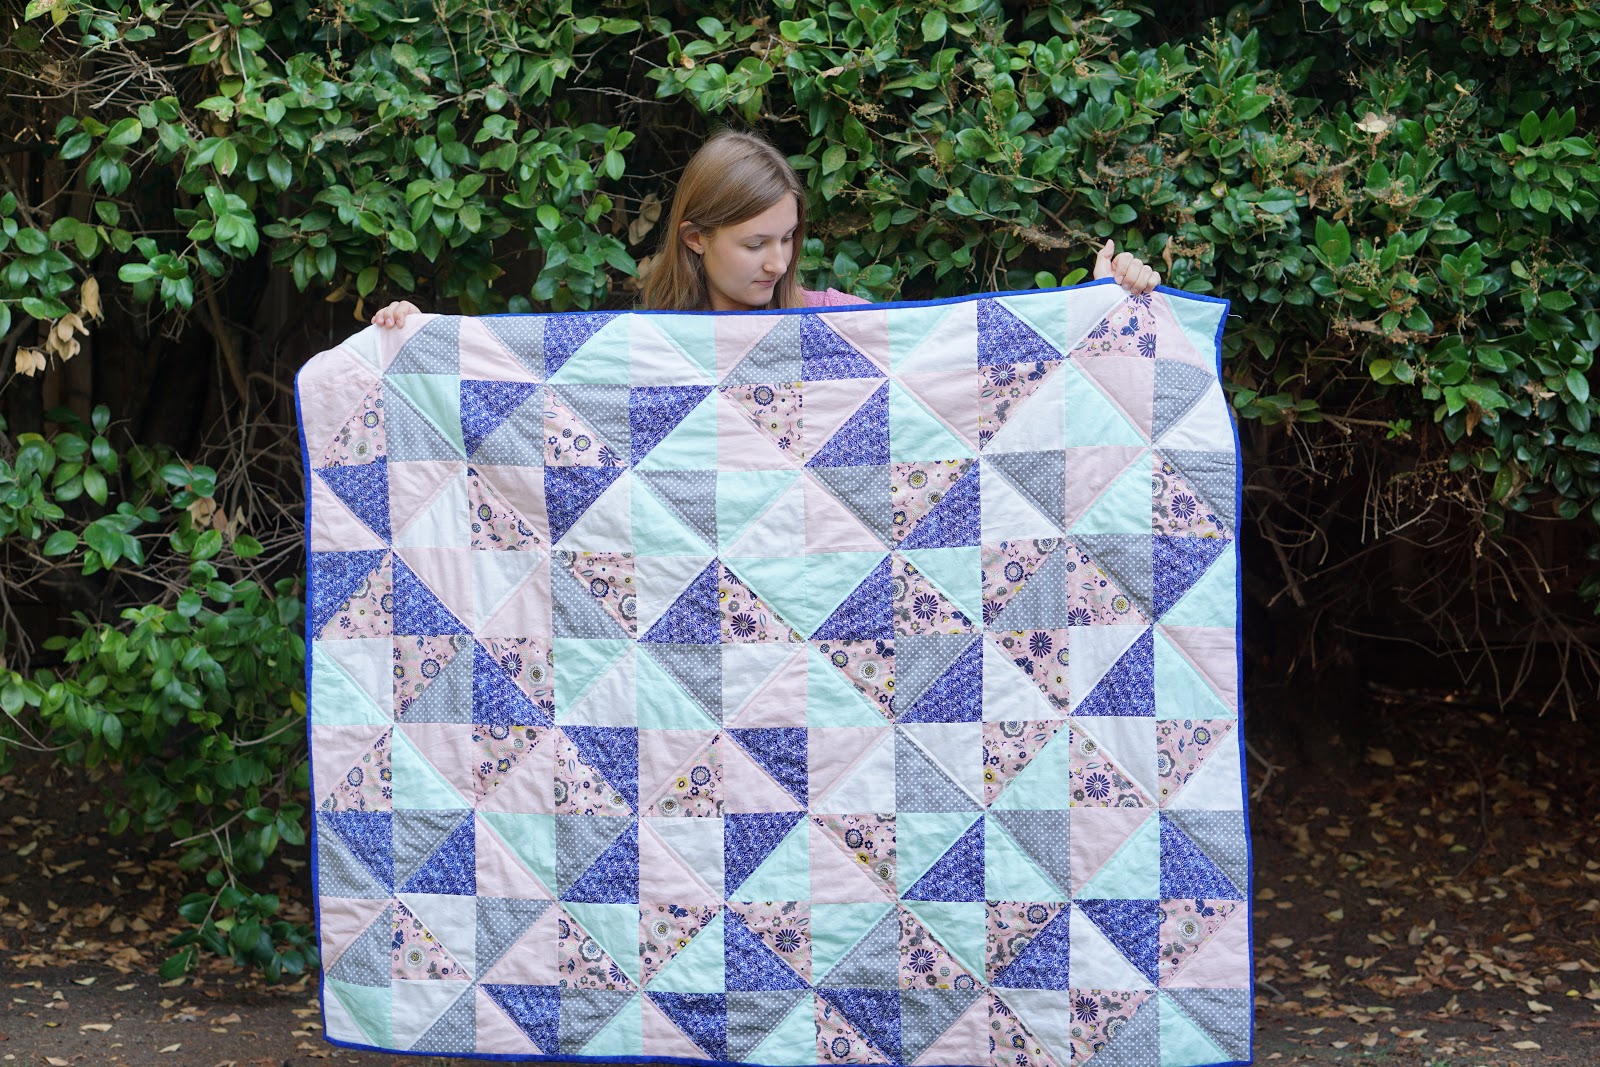
I did it!!! I have just completed my very first quilt. And I am in love with it! I am so so pleased with how it turned out! I started working on it on July 21st, went on vacation for a week, then came back and finished it on August 17th. All the hard work was so worth it, and makes the finished product all the more special in the end.
This quilt is a treasure that I will have for the rest of my life. That being said, it was made to be used. I'm not going to try to preserve it in any way. I'll bring it outside, I'll let the cat sit on it, I'll let my future kids crawl on it, I'll bring it on roadtrips. It will soak in my life as I live it, and it will be with me all the way through. No matter how worn and ragged it gets, I'll keep it forever.
I absolutely love the colors I chose. It was such a hard decision, but it turned out so nice! And I think the dark blue border around the edge makes it look so professional and finished.
The pattern I used was Elise Joy's triangle quilt. I used 100% cotton fabrics from Joann's and Mountain Mist 100% polyester quilt batting.
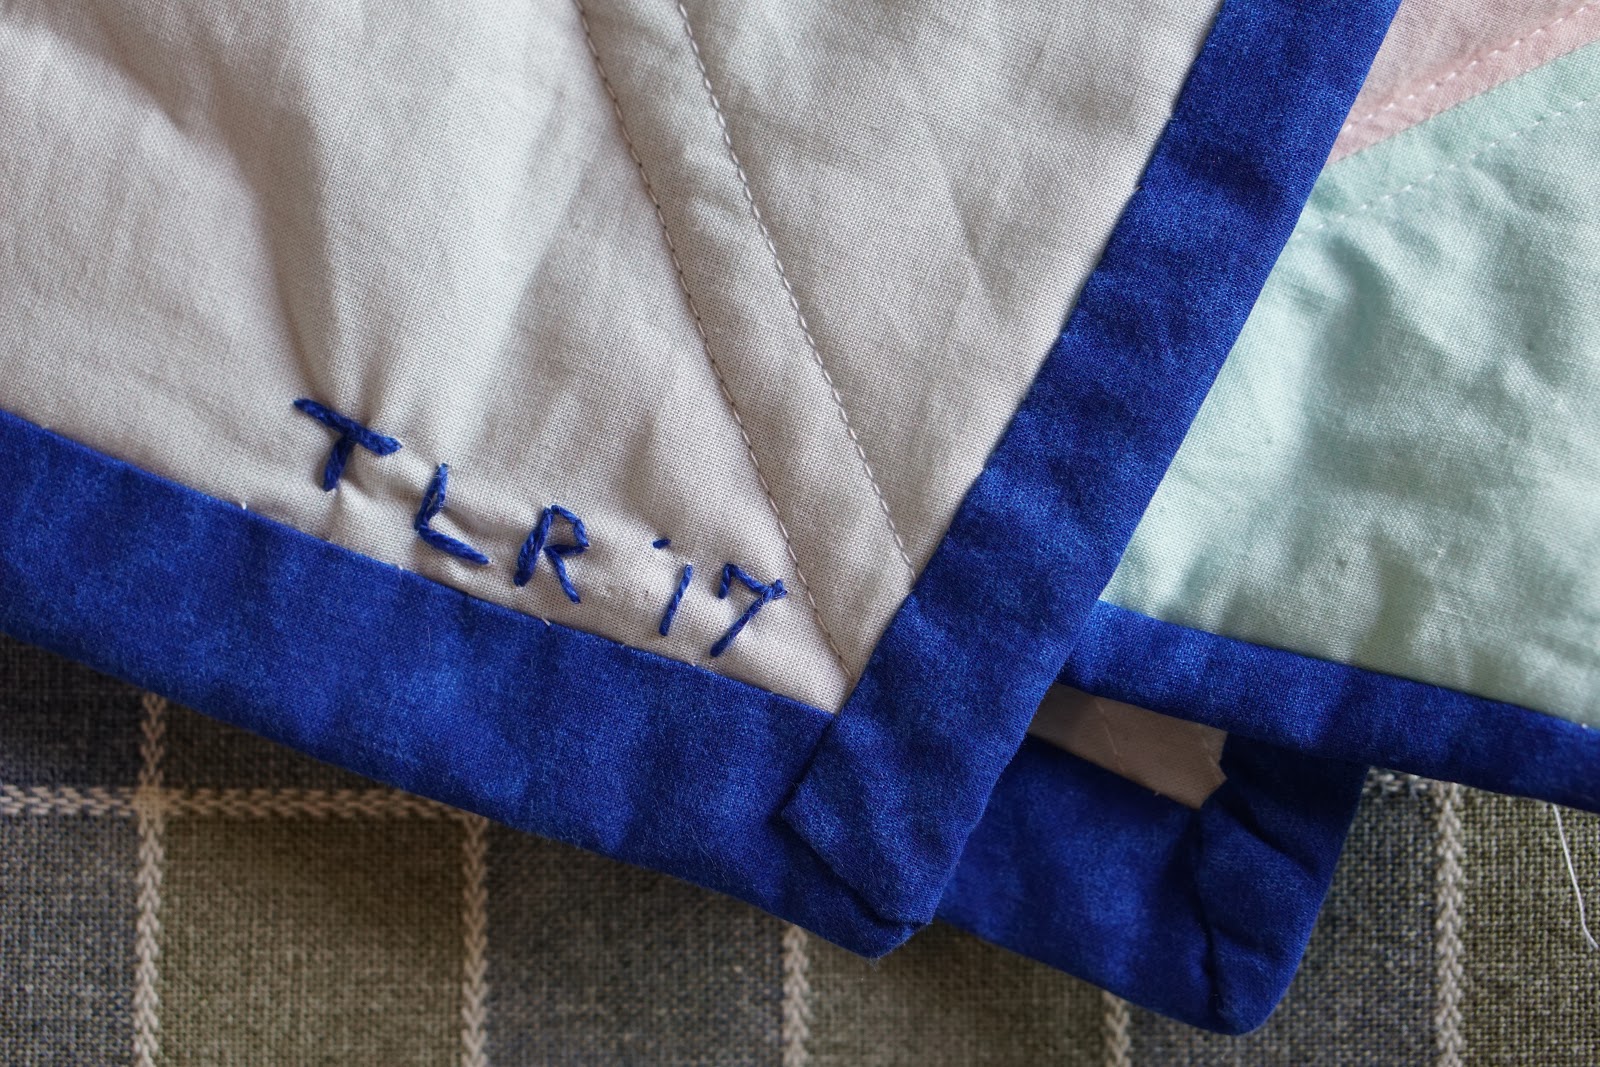
At the very end, I used dark blue embroidery thread to add my initials and the year. It was such a fun finishing touch! Right when I pulled my needle through the last bit of my signature, my audiobook ended! It was such a funny coincidence.
I know that this quilt will not be the last one that I make in my life, but it will always be extra special to me because it was my first. Thank you for following along with me on this quilt-making journey!
DIY Canvas Quote
8:00 AM
This project reminded me a lot of that rainbow scratch paper I used to draw on as a kid. Like this one on Amazon. It starts off as a black sheet of paper, but as you scratch away at it with a little wooden dowel, all the rainbow colors start peeking through. This project is basically the grown-up version of rainbow scratch paper. It was inspired by this post on Elise Joy's blog. And I must say that I love how it turned out! Also, it felt like a fitting project to do after the end of my 100 Day Project, which was all about quotes and lettering.
DIY Soy Candles
8:00 AM
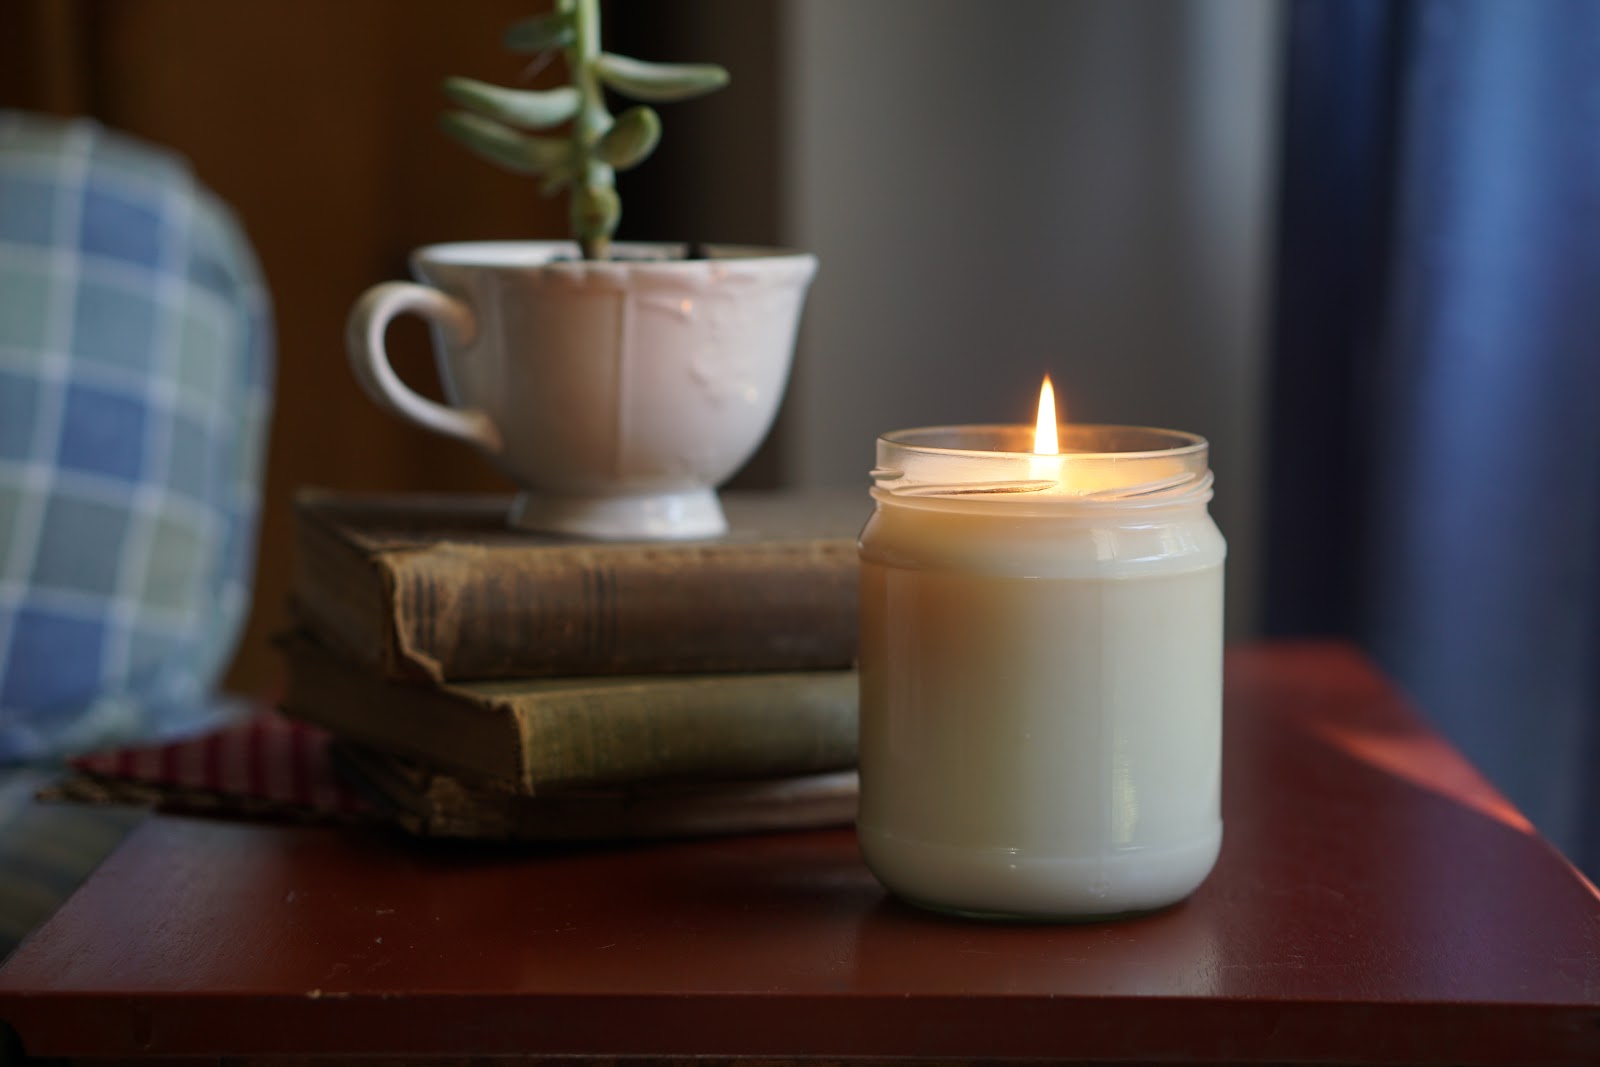
I've wanted to try candle-making for what feels like ages! I love candles and making my own sounded so fun! But for some reason, it felt daunting. I didn't know what type of wick to buy or what kind of wax to get. But this last week, I was determined to figure it out. And as it so happens, it wasn't even that complicated! You really only need three or four supplies.
Ceramics Update!
9:08 AM
A few weeks ago, I shared a 100 Day Project update. Today I thought I'd talk about my other current creative project -- ceramics! In this post, I mentioned that I was going to take a ceramics class this quarter. Now, the quarter is just about over and I have had so so so much fun with ceramics! It has been such an exciting new experience! I loved it so much that I'm planning to continue with ceramics, either over the summer or during fall quarter. I haven't decided yet. What I have decided is that I haven't had enough of it! I feel like I have officially gotten the hang of it now -- the wedging, the wheel-throwing, the carving, the glazing. I actually can't decide which step of the process is my favorite. I love it all! It is such a meditative, relaxing, rewarding hobby.
100 Day Project Update!
10:37 AM
Here we are, at day 48 of the 100 Day Project!! You know what that means: I'm almost halfway done! If you don't know what I'm talking about, check out this previous post. Basically, I decided to participate in the 100 Day Project this year. I chose hand lettering as my challenge. (My hashtag is #100DaysofHandLetteringbyTrina, if you want to see all of the days so far.)
Since I am practically halfway done, I thought I'd share a little update here on the blog and talk about some of my favorite supplies that I've been using these past 48 days!
Quilt Inspiration
1:47 PM
This year I made a few of what I decided to call "Bullet Point Resolutions". They are little, random things that I want to make sure to do this year that don't really have anything to do with my main resolution. For example, a few of my bullet point resolutions are drinking more water and reading more and exercising.
Also on that list is starting a quilt! Even though we're already in the fifth month of 2017 and I have yet to get a good start on this one, I still fully intend to do it. And, besides, I have made a little progress. I bought my batting, for example, and practiced quilting techniques with some smaller projects. I'm planning to complete the bulk of my quilt this summer.
The main thing I've done in preparation is search for inspiration. Since making a quilt is going to be a relatively big project in terms of money and time commitment, I want to be sure that I am happy with the result. For me, the hardest part in this process is going to be making the decisions. I'm okay with the cutting and the sewing, but its picking out the fabric and choosing the pattern that are the most daunting steps to me. To help in this process, I have collected a few images of quilts that I like so that I can start to get a feel for what I want mine to look like. I thought I'd share some of my inspiration here. (I've included sources to all of the quilts below!)
My 19th Year Scrapbook
7:00 AM
When I turned 18, I thought it would be a perfect time to start documenting my life year-by-year. I had the desire to start a scrapbook, and combining that with the fact that I was entering my very first year of adulthood and would soon be undergoing a major life change (college), the time was ripe to start recording my memories.
Because I celebrated my 19th birthday in March, and thus began my 20th year of life, it was time to start wrapping up my 19th Year Scrapbook. During spring break, I printed out my final batch of photos and filled up the last few pages. I put so much time into this scrapbook (literally hours and hours and hours), so I thought I'd share a few photos of some of my favorite pages here.
My Recent Quilting Projects
2:40 PM
One of my New Year's Resolutions (and probably the one I'm most excited about) is to make a quilt. Before this year, I had never quilted before. I've been sewing for a couple years, but quilting is new territory. My family and I have a few quilts that have been passed down to us as family keepsakes. They are so beautiful and we treasure them so much! Quilts take so much time and love to make. It's so cool to hold a quilt and think about the person who made it and all the hours they spent on it, cutting, ironing, sewing, washing, etc.
I'm not planning to preserve my quilt so it can be a family heirloom or anything. I want to use it. But wear doesn't necessarily make something less valuable. You can tell that when something is worn, whether that thing is a book or a kid's stuffed animal, it has been loved. It will be so special to keep this quilt for my whole life.
DIY Chalkboard Bunting
8:00 AM
Tomorrow is Halloween!! Are you ready? Is your costume prepped? Have you bought your candy? As with every year, I am struck by how strange this holiday is. But I'm not arguing. I love holidays. They're opportunities to make memories with friends and family, have fun, and forget about the daily grind of life. So have fun tomorrow, whatever you're doing (but do be safe!).
This chalkboard bunting is so versatile. I decided to spell out "Happy Halloween", but you can pick any phrase, and change it up whenever you want! I'm totally going to bring it back out for Christmas and New Year's. It's super easy to make and very inexpensive. The only material you may not have already is chalkboard paint, which you can easily pick up at Michael's.
DIY Halloween Costumes
8:00 AM
Halloween is just around the corner, believe it or not! We have just over two weeks to come up with the perfect costume! I love making my own costumes. Handmade costumes are so much more fun than those cheap ones you can buy at Spirit. For a bit of inspiration, I gathered up six DIY costumes from across the Internet to share with you. (I didn't even realize that five out of the six were food-related until I put them all together. Oops!) Which one is your favorite? I think I like the strawberry one the best.
DIY Bud Vase
9:41 AM
I absolutely love having fresh flowers around. They completely brighten up a room and have actually been proven to improve your mood! This DIY bud vase is a great way to display a single flower picked from the garden or the last surviving one from a bouquet. And all you need is a glass bottle (like a soda bottle) and spray paint in the color of your choice. I used Krylon ColorMaster in bright white.
DIY Cactus Tote Bag
7:51 AM
DIY Wall Hanging
5:24 PM
I'm going to be doing a lot of dorm shopping this week. (To read more about my college plans, check out this post!) But in addition to buying all the necessities, I have to remember to decorate my dorm and truly make it mine. This DIY is one thing that will definitely find a home somewhere in my dorm room. I love how it turned out! I was actually inspired by something I found on Etsy and decided to just make it myself!
You can choose any word you want for this project, or even shrink the letters a bit and fit in a whole phrase! I added pom-pom trim to mine (leftover from this DIY), but feel free to customize it any way you want. I'm thinking of adding some tassels later!
DIY Drawstring Sunglasses Pouch
5:27 PM
Hey hey! As you all know, I went on a trip to Mexico earlier this summer. It was so hot and sunny! Luckily, I had my sunglasses. But as I was packing them, I realized that the only sunglasses pouch that I have is an old one that my parents lent me years ago. It works fine, but, let's be honest, isn't the prettiest. So I rushed downstairs and quickly sewed up this one! Really, it's that easy. It hardly took any time at all. Fortunately, I thought to take pictures along the way so I can share the how-to here!
While I was at it, I added some glittery corners to the black frames of my sunglasses just by swiping on some gold glitter nail polish! That tutorial is also included in this post.
Hope your summer is wonderful so far and full of adventures!
(See how to make the cover-up in the picture above by clicking here!)
DIY Beach Cover-Up
8:00 AM

As you know, I recently came back from a trip in Mexico! (I recapped my trip here and here.) I knew there was going to be a lot of pool and beach time, so I decided to sew up this cover-up before I left for my trip. It was as I was working on this project that I discovered my deep love for pom-pom trim! It instantly made the cover-up so much cuter! I found my pom-pom trim at Joann's. You can buy it by the yard or by the roll. I'm trying to think of more ways to use it, like on a tote bag or a scarf. We'll see what I come up with!
Anyway, if you'd like to make this cover-up for yourself, follow the steps below!
DIY Dyed Napkins
6:38 PM
Happy Sunday! Today I want to share a really fun DIY with you. At least, I had a lot of fun with it! The other day, I found some powdered dye packets at the craft store and realized that the last time I dyed anything was when I made tie-dye shirts as a kid, so I decided to buy some dye and experiment. I tried folding the napkins a lot of different ways and it was such an exciting surprise every time I unfolded the napkin to see the resulting design! In this post, I am going to share my favorite ones. I dyed ten napkins in total, but in my opinion these were the best five.
Easy DIY Painted Basket
1:44 PM
Subscribe to:
Posts (Atom)