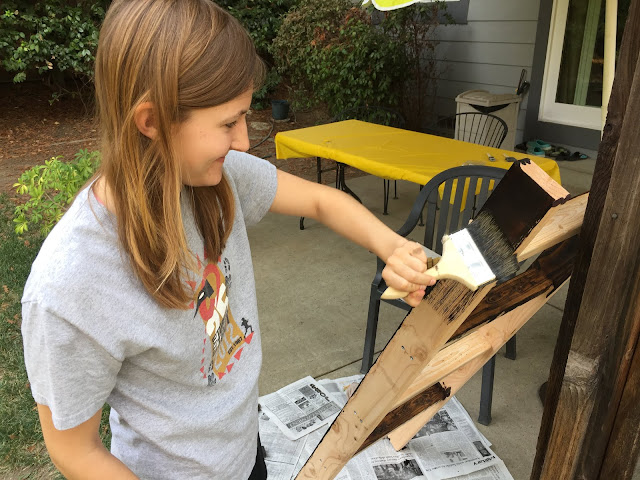
This project was unlike anything I had ever done before! Before this, I had never gone to Home Depot by myself, never bought lumber, never used a drill, never used a power sander, never stained wood... the list goes on and on! I learned so much doing this project and had such a great time with my dad working on it. We spent an entire Sunday afternoon working on it together in the backyard. It was definitely one of my favorite days of the summer.
I have always admired blanket ladders. They are such a fun way to display blankets and quilts (especially quilts!!). But they are surprisingly expensive!! I've seen them cost anywhere from $50 to $200! But this DIY version cost me about $15 and was so fun to make. Plus you get to customize it by choosing your own dimensions and your own stain.
I used several tutorials to make this blanket ladder, including this one from Hey There, Home, this one from Gluesticks, and this one from Sydney Makes Stuff. Here were the final dimensions that I chose to use:
As for supplies, I used:
- 2 2x4's (at least 5' long)
- 1 2x3 (at least 6' long)
- wood stain (I used Minwax Dark Walnut.*)
- 16 wood screws (2.5" long)
- sandpaper or power sander
- power drill, plus drill bit
*Of course the stain is entirely up to you and everyone has their own tastes, but personally I really liked the darker color. It contrasts nicely with colorful blankets!
First, cut the wood down to size. I bought my wood from Home Depot and asked an employee to cut it for me, which made my life so much easier. You'll need 2 2x4's that are 5-feet long and 4 2x3's that are 1.5-feet long.
Next: sand everything! This really makes the wood look so much nicer. Obviously this is so much easier with a power sander, but if all you have is sandpaper, I still think it's worth the time and effort. My wood was totally transformed after I sanded it. Plus, you don't want your precious quilts catching on rough wood.
Lay all your pieces out on a flat surface and mark where the screws are going to go. I put two screws on each side of each rung (so, four screws per rung and sixteen screws total). I marked the center of the 2x4, then measured a half-inch above it and a half-inch below it and marked those spots with X's. That's where I put the two screws, so they were about an inch apart.
Screwing the pieces together was, for me, the hardest part, especially because the 2x3 rungs need to be centered on the 2x4, so you have to hold the rung off the table while drilling. It helps to have a buddy for this step!
Here's a quick little lesson on pilot holes. In order to get the screw into the wood without the wood splitting, you need to drill a pilot hole using a drill bit before inserting the actual screw. Choose a drill bit that is a tad smaller than the screw. My advice: start small. You can always make a hole bigger, but you can't make it smaller. If you drill a pilot hole that is too big, the screw won't have any traction and will just spin around and around. That being said, if you drill one that is too small, the screw will put too much tension on the wood and the wood may split. I know, it's complicated!! Just try your best and roll with it. It doesn't have to be perfect!

Next, stain it! Follow the instructions on the can. This step is very messy so wear old clothes, set out a lot of newspaper to protect surfaces, and try your best not to get any stain on your hands! (It's hard to wash off!)
Last -- apply a few coats of polyurethane and let it dry for 24 hours. I chose to stick on a couple felt pads on the edge of the ladder that leans against the wall. This prevents the stain from rubbing off onto the wall.
Done! Isn't it beautiful? I love how it turned out, especially with my handmade quilt on it. This project has opened up a whole new world of DIY to me! What will I make next? (Maybe a bookshelf??) The possibilities seem endless right now.


No comments:
Post a Comment